Compute Manager not visible in NSX after Upgrade of the 3 Manager Appliances

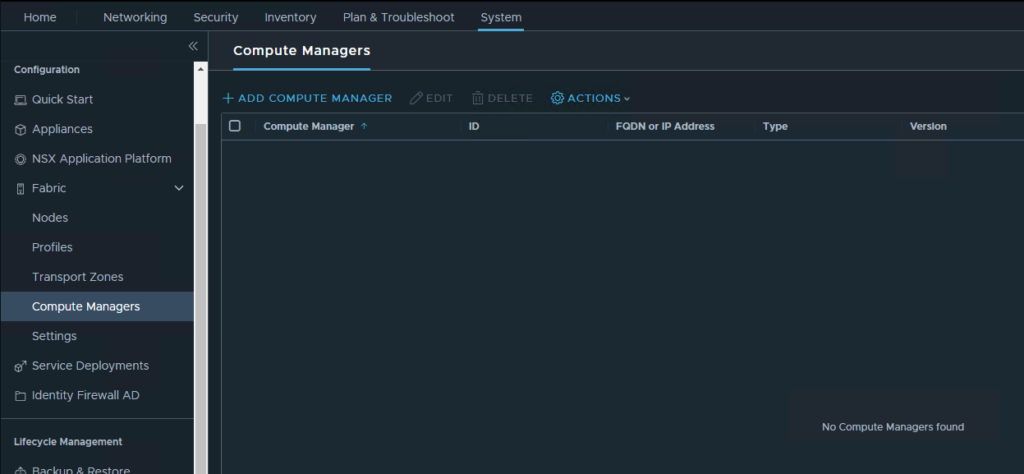
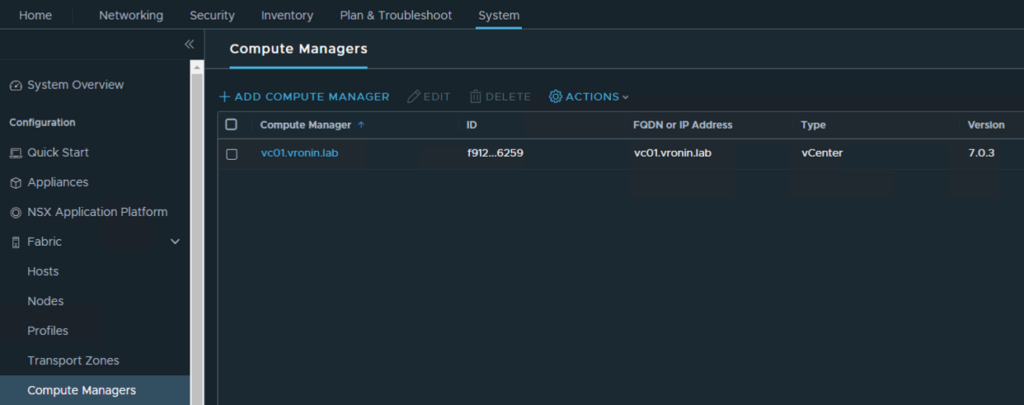
After a successful upgrade of NSX, after the last step the upgrade of the management plane the compute manager disappeared, let’s see how we can fix that!

When i try to add the vCenter it says it is already registered, let’s check with the API.

First do a API GET in Postman to get the compute manager id:

Output:

Now we have the compute manager id, we can check if it is registered and up:

Output:


As you can see the compute manager is registered and up, why is it not showing up in the UI?

Solution:

Login with the admin user by SSH, and run the following command.

start search resync inventory

Wait a few seconds and refresh the UI, now the Compute Manager is back!


RTEP down in Global Manager NSX-T UI

A while ago we ran into an issue after we did the upgrade from NSX-T version 3.1.3.6 to 3.1.3.7. In the alarms section at one Site. Still wanted to do a post about the issue and the solution/workaround:

Time to check the connection!
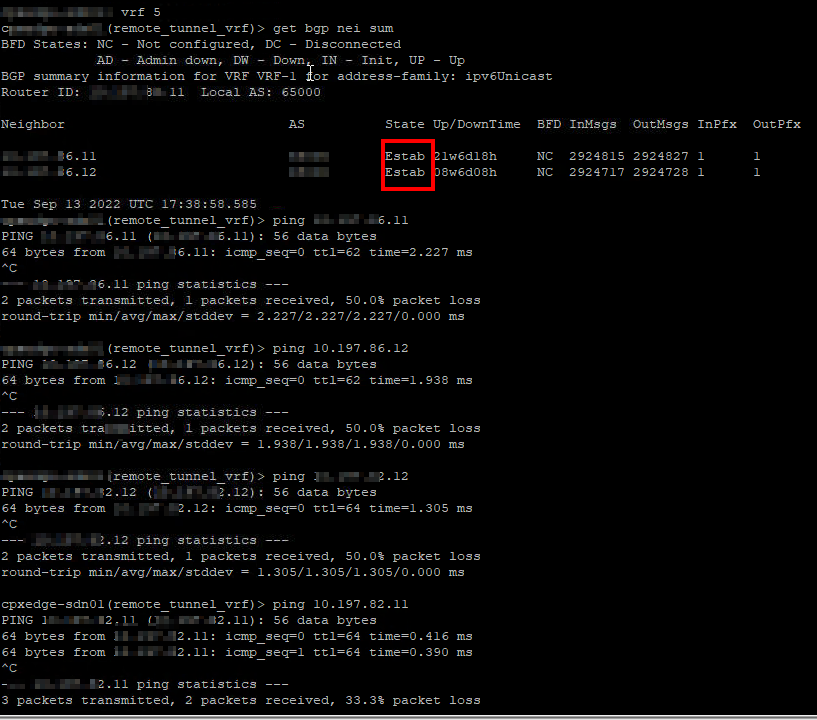
Login to the Edges and grap the VRF id of the RTEP TUNNEL.

Check the BGP and ping between the RTEP ip addresses on both sites.

As you can see all BGPs are established and the ping commands give a reply.
Let’s do another check from Postman:

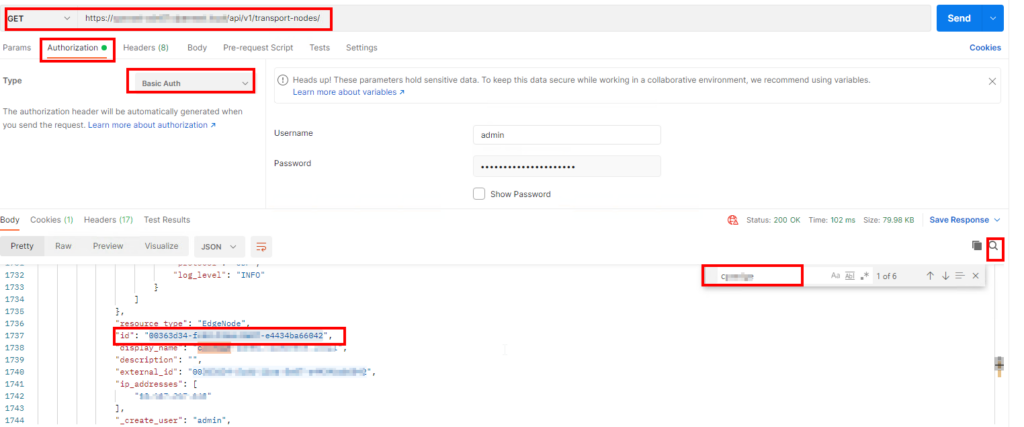
Open Postman and fire a GET api call to the nsx-manager to grab the edge id we need in the next api call:
API GET call:

https://<nsxmanager ip>/api/v1/transport-nodes/

Just select Basic Auth under the Authorization tab and fill in the Admin credentials.

Hit Send, when getting a reply in the Body, search for the edge name and the corresponding id.

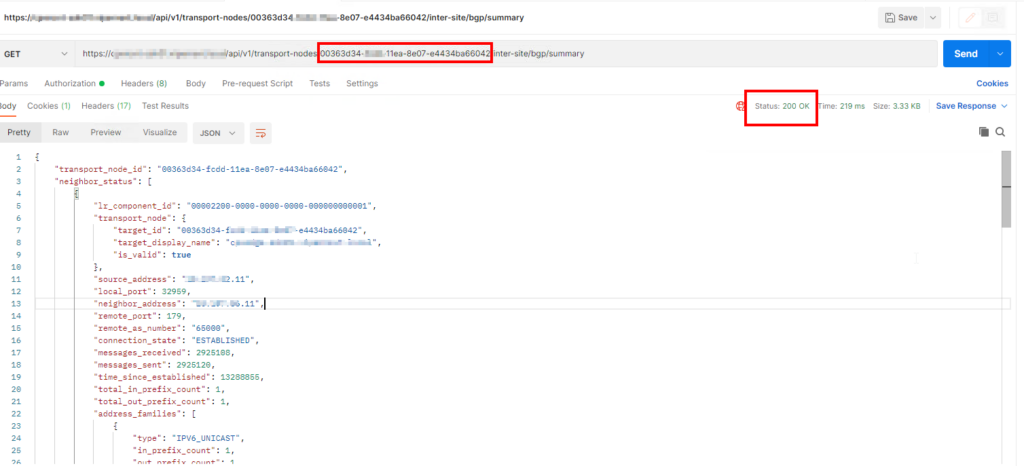
Now we use this id to get the RTEP status:

GET https://<nsxmanagerip>/api/v1/transport-nodes/<edgenodeid>/inter-site/bgp/summary

Check the output and the Return Status for issues, as you can see in the example above the BGP to one of the peers is establised.

Solution:

So it seems like the issue is known in the 3.1.3.7 version in a 3 manager nodes setup.

The node which has generated the alarm, only that node can clear alarm from in-memory when it will receive remove alarm from the edge node. The Alarm was resolved on 1 of the manager nodes, but it was showing on other nodes and it was keeping the alarm as active.

The following workaround will remove the alarm: Restart the proton service on ALL manager nodes.

– SSH with the admin user to the NSX-T manager nodes:
– execute the following commands:

Stop service proton
Start service proton

UPDATE: The issue is fixed in version 3.2.1

Upload MUB file fails with ansible-for-nsxt

While trying to upgrade the NSX-T enviroment via ansible we stumbled upon the issue that we couldn’t upload the mub file to the NSX Manager.

Ansible Task:

- name: Upload upgrade file to NSX-T manager coordinator node from file
  vmware.ansible_for_nsxt.nsxt_upgrade_upload_mub:
    hostname: "{{ coordinator }}"
    username: "{{ username }}"
    password: "{{ password }}"
    validate_certs: False
    file: "{{ nsx_upgrade_mub_file }}"

This gave us the following error message:

fatal: [127.0.0.1]: FAILED! => {
    "changed": true,
    "invocation": {
        "module_args": {
            "file": "/root/hypervisor/upgrade_bundle/VMware-NSX-upgrade-bundle-3.2.1.1.0.20115686.mub",
            "hostname": "manager1",
            "password": "VALUE_SPECIFIED_IN_NO_LOG_PARAMETER",
            "port": 443,
            "timeout": 9000,
            "url": null,
            "username": "admin",
            "validate_certs": false
        }
    },
    "msg": "Error: string longer than 2147483647 bytes"

So it looks like the upload can’t handle files over 2GB.

Honoustly my python skills are a bit rusty, so i asked one of the developers in our team to help me out and see if we could get this fixed.

The 2GB+ filesize is the issue. You can find multiple references to the error, usually referring to the httplib, urllib or ssl..
One solution is to use streaming upload.

This is what we did to make the upload work.

Install request-toolbelt package

Edit nsxt_upgrade_upload_mub.py
NOTE: This will break the URL upload!
Add:

import requests
from requests_toolbelt.multipart import encoder
from requests.auth import HTTPBasicAuth 

Replace line 140 – 174 with:

        session = requests.Session()
        with open(file_path, 'rb') as src_file:
             body = encoder.MultipartEncoder({
                 "file": (src_file.name, src_file, "application/octet-stream")
             })
             headers = {"Prefer": "respond-async", "Content-Type": body.content_type}
             resp = session.post(mgr_url + endpoint, auth=HTTPBasicAuth(mgr_username, mgr_password), timeout=None, verify=False, data=body, headers=headers)
             bundle_id = 'latest'#resp['bundle_id']
             headers = dict(Accept="application/json")
             headers['Content-Type'] = 'application/json'
             try:
                 wait_for_operation_to_execute(mgr_url,
                     '/upgrade/bundles/%s/upload-status'% bundle_id,
                     mgr_username, mgr_password, validate_certs,
                     ['status'], ['SUCCESS'], ['FAILED'])
             except Exception as err:
                 module.fail_json(msg='Error while uploading upgrade bundle. Error [%s]' % to_native(err))
             module.exit_json(changed=True, ip_address=ip_address,
             message='The upgrade bundle %s got uploaded successfully.' % module.params[mub_type])
        session.close()

NOTE: This will break the URL upload!

The response will show:

changed: [127.0.0.1] => {
    "changed": true,
    "invocation": {
        "module_args": {
            "file": "/upgrade_bundle/VMware-NSX-upgrade-bundle-3.2.1.1.0.20115686.mub",
            "hostname": "nsxmanager",
            "password": "VALUE_SPECIFIED_IN_NO_LOG_PARAMETER",
            "port": 443,
            "timeout": 9000,
            "url": null,
            "username": "admin",
            "validate_certs": false
        }
    },
    "ip_address": "<ip>",
    "message": "The upgrade bundle /upgrade_bundle/VMware-NSX-upgrade-bundle-3.2.1.1.0.20115686.mub got uploaded successfully."
}

Solution is also added to a github BUG report:

https://github.com/vmware/ansible-for-nsxt/issues/416

All Kudos to my colleague for fixing the issue!

VMware Usagemeter issue sending data after upgrade to 4.5.0.1

This week i upgraded an usagemeter from 4.5.0.0 to 4.5.0.1 with the inplace upgrade method.
Usage Meter 4.5.0.1 patch release rolled out on May 23rd. This release addresses a major issue found in Usage Meter 4.5. For more information i refer to the following blog:

https://blogs.vmware.com/cloudprovider/2022/05/usage-meter-4-5-0-1-why-is-it-needed-and-how-to-upgrade-to-it.html

The release notes can be found at:
https://docs.vmware.com/en/vCloud-Usage-Meter/4.5.0.1/rn/vmware-vcloud-usage-meter-4501-release-notes/index.html

We followed the upgrade guide provided by VMware:
https://docs.vmware.com/en/vCloud-Usage-Meter/4.5/Getting-Started-vCloud-Usage-Meter/GUID-AE5A81E1-097A-4EED-9A8E-8BF7E0B378A4.html?hWord=N4IghgNiBcIJYDsC0AHCYDGBTABAVxQHMAlAQQBEBREAXyA

After the reboot and check if the upgrade was successful we tried to send a test update to the Usage Insight. The test send of data failed with thw following error:

In the notifications we can find the following messages:

After a search through the VMware Knowlegde Base I came across this article:

https://kb.vmware.com/s/article/82023

To test connectivity to vCloud Usage Insight by using the curl command:

curl -kv https://ums.cloud.vmware.com/um/api/v1/ping --proxy 192.168.1.50:8080

The response came back with HTTP status code 200, so that was OK.

Now we check the vCloud Usage Meter registration status in vCloud Usage Insight by using the curl command:

curl -kv https://ums.cloud.vmware.com/um/api/v1/upload/registration?um=<UM UUID> --proxy 192.168.1.50:8080

This response also came back with HTTP status code 200, so AOK, so far for the checks…

Let’s get in touch with GSS

As this was the advice all along in the first error message ….

The GSS engineer stated that there was an issue with the nginx jvm settings when using a proxy.
We had to add a line to the nginx.conf in the following directory, but before we change anything lets make a snapshot of the system in case we ruin everything.

Remark: Please contact GSS if you want support editing files, and always make a backup or in this case a snapshot before changing settings

Edit the nginx.conf and add the follwing line somewhere around line 58,

This line set a dummy file for proxy configuration., we are setting a dummy proxy configuration as we are hitting a known issue and this will be fixed in a future release.

jvm_options "-Dproxy_config=/tmp/vami-file";

Go down one dir to /opt/vmware/cloudusagemetering

Stop NGINX service with the follwing command:

./scripts/stop.sh GW

Now start the service again:

Start NGINX service

Now get the status of all services:

You see a lot of errors, these can be ignored.

Now go to the VAMI UI and reset the proxy again:

Test

Now go to the Settings Page in the Usage Meter UI and Send an update to Usage Insight.

It works! You can also check the usagemeter in Insight: Go to https://ums.cloud.vmware.com/ui/
The last update should be after the issue was fixed!

Remark: Please contact GSS if you want support editing files, and always make a backup or in this acse a snapshot before changing settings